Wairarapa Violins:
repairs and restorations
Contact: Stephen Butcher
sphlat@actrix.co.nz
sphlat@actrix.co.nz
 Here
is a little photo essay on a recent restoration. The
violin had damage to edges which is normal for an
instrument of its age. The original varnish had turned
jet black and been already been removed.
Here
is a little photo essay on a recent restoration. The
violin had damage to edges which is normal for an
instrument of its age. The original varnish had turned
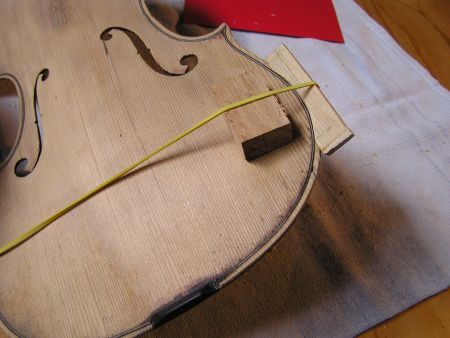
jet black and been already been removed.This first photo is of a new block of wood being glued in to replace a missing edge. The rubber band applies gentle pressure to the join simply to stop the new wood sliding until the glue tacks off.
The aim with these edge repairs is to make the fit very close. A good fit should see the new part held in place by suction before it is glued.
 And, on to another edge.
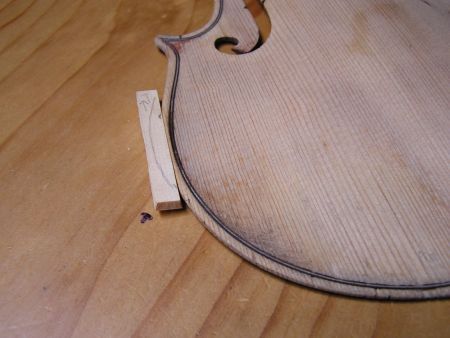
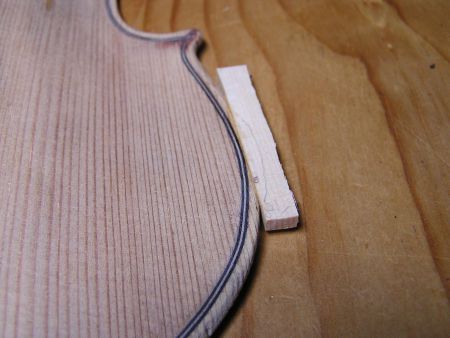 These are easy repairs
where the damage or wear has not gone back to the
purfling. These wide grain tops have certainly caused
many a violinist a moment of grief as a crack or split
in the edge gets caught on clothing. Better to glue it
properly before it gets caught!
These are easy repairs
where the damage or wear has not gone back to the
purfling. These wide grain tops have certainly caused
many a violinist a moment of grief as a crack or split
in the edge gets caught on clothing. Better to glue it
properly before it gets caught!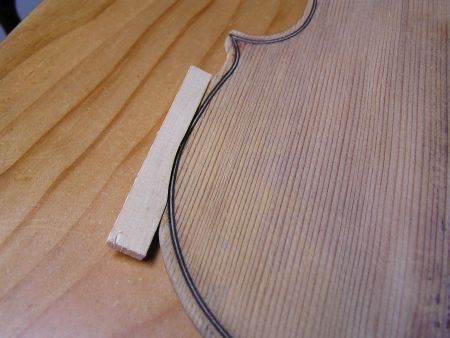 When the repair goes back
to the purfling, the join has to be perfectly fitted
to both the purfling and the grain lines of the
original wood.
When the repair goes back
to the purfling, the join has to be perfectly fitted
to both the purfling and the grain lines of the
original wood.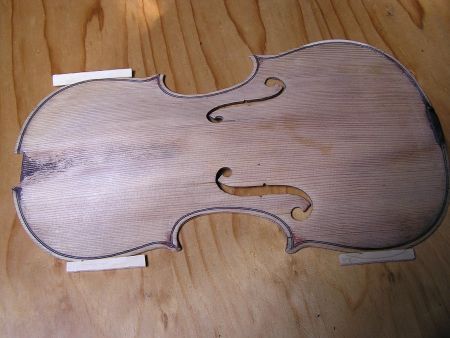 Nearly there. The new wood
looks awful against the original but every luthier has
their little secrets for aging the new wood a hundred
years or so before refinishing. My methods take a
little longer than others...
Nearly there. The new wood
looks awful against the original but every luthier has
their little secrets for aging the new wood a hundred
years or so before refinishing. My methods take a
little longer than others...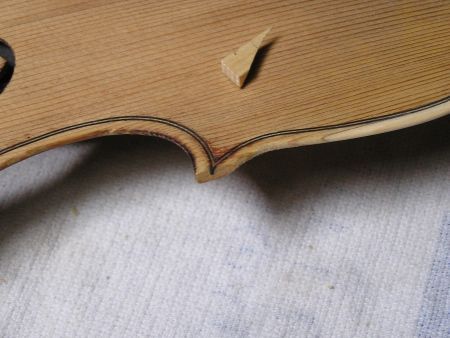 The corner is gone but the
purfling is intact so another easy fix. The tricky
part is getting the new part shaped so that it is
dimensionally correct and looks like the hand of the
original maker.
The corner is gone but the
purfling is intact so another easy fix. The tricky
part is getting the new part shaped so that it is
dimensionally correct and looks like the hand of the
original maker. This is a judgment call -
to completely disguise the repair or leave evidence.
I've taken the latter path of leaving the history
visible.
This is a judgment call -
to completely disguise the repair or leave evidence.
I've taken the latter path of leaving the history
visible.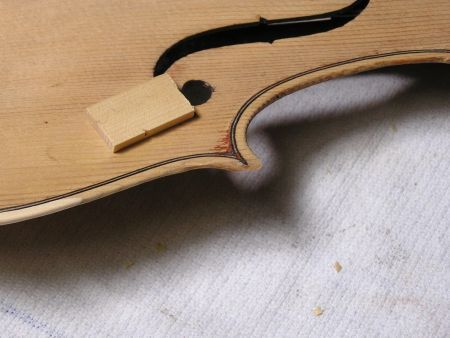 Another corner. Nearly
there.
Another corner. Nearly
there.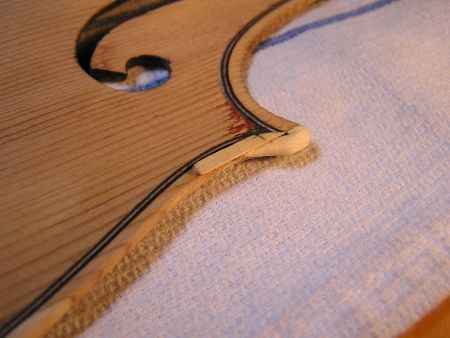 A small insert to fill a
borer channel. Pesky wee insects when they get inside
an instrument and the one or two holes on the outside
really don't give a true picture of their diligent
tunneling. Stopped by the purfling in this case.
A small insert to fill a
borer channel. Pesky wee insects when they get inside
an instrument and the one or two holes on the outside
really don't give a true picture of their diligent
tunneling. Stopped by the purfling in this case.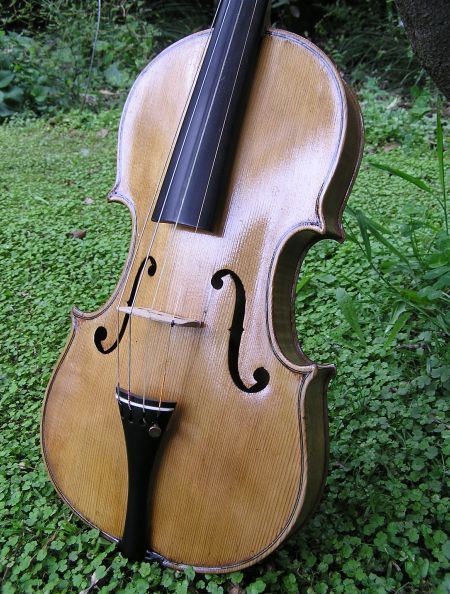 The finished belly.
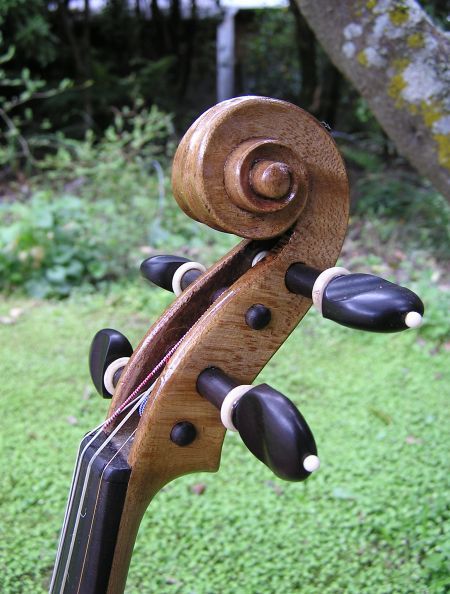 The scroll.
 And the finished back.
 txt: 021 08251625 email:
sphlat@actrix.co.nz
.
.